
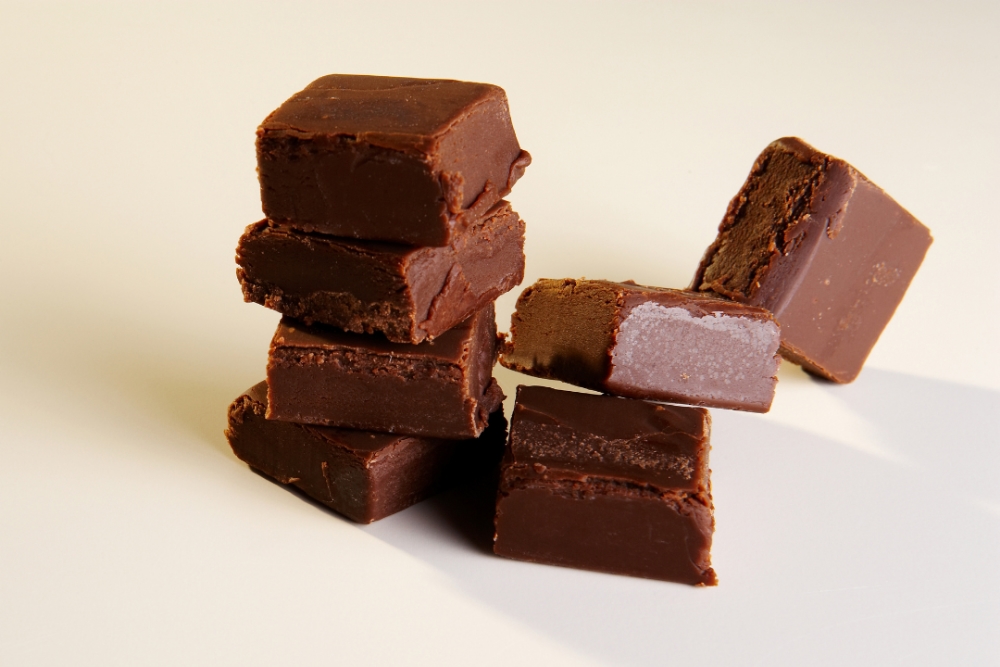
Can I get a holler from all you other chocolate fans out there? I can’t actually hear you because, you know, reading. But I know you’re out there. Years ago, I realized that when I craved chocolate, it wasn’t really the chocolate chip cookie, chocolate eclair, pudding or even cake I wanted. I just wanted that intense flavor of chocolate to savor which could be had in the form of a square of a chocolate bar OR a square of this two-ingredient chocolate fudge. So, get right down to it with me here, with this recipe that gives you your chocolate fix in one bite.

Recipe for Two-Ingredient Chocolate Fudge
Ingredients:
1 pound semi-sweet chocolate chips (I prefer Ghiradelli)
1 cup heavy cream
Optional variations:
1 tsp vanilla extract
1/4 cup chopped lightly toasted walnuts or pecans
Directions:
It’s going to seem like there are a lot of directions here but I’m just breaking down the whole process for you to make it easier. It’s actually very easy and very fast.
1. Spray an 8 X 8 pan with a little non-stick spray, then line it with aluminum foil with one piece going one direction and folding over the edges and the other piece going the other direction, also with the edges folded over. Imaging a big “plus sign” of foil. Set this aside. Then, prepare a space in your freezer where that pan can sit flat and undisturbed for a few hours. Don’t actually put the foil-lined pan in the freezer, just make sure you have a place ready for it once you add the fudge.
2. In a double boiler, bring the water in the bottom part to a boil then add the chocolate chips to the top part. Every few moments, give them a stir, from the bottom up. A spatula is helpful versus a spoon.
3. As the chocolate starts to melt, be very careful to stir it frequently and turn the heat down because you can go from perfectly-melted chocolate to “seized up” chocolate in a matter of seconds. There’s no coming back from the chocolate having firmed up. You’ll have wasted all those chips and that’s sad.
4. As soon as the majority of the chocolate is melted, slowly add in the cream, stirring as you go, continuing to stir from the bottom so that a layer on the bottom doesn’t harden. Add the vanilla and/or nuts if using.
5. Once the chocolate mixture is blended, carefully pour it all into the prepared pan. Leave it out for about 15 minutes so that it cools down.
6. Once the pan has cooled some, you can put it in the freezer in the space you’ve prepared that allows the pan to lie flat. Leave it for several hours or until the chocolate has firmed up but isn’t rock hard.
7. Using the overhanging foil, lift the fudge out of the pan (you may need to use a table knife to loosen the corners. Place it on a cutting board and, using a large knife, cut the fudge into small squares of about 1-inch. If the fudge seems too soft, put it back in the pan and back in the freezer for a bit. You want it to be soft enough that you can put a knife through it but firm enough that it holds its square shape.
8. Lastly, put the squares in a zipper bag and freeze. Now, the best part – when you want some chocolate, take out a square, being sure to seal up the bag again really well to avoid freezer burn. Leave the piece out for about five minutes and then enjoy it. Savor the flavor and how the cool chocolate melts in the heat of your mouth. Really focus on it! That one piece will be enough if you just give it the attention it deserves and enjoy the pleasure of it.


Leave a comment